Sonic The Hedgehog 3 Walkthrought
In Sonic the Hedgehog 3—just “Sonic 3” on the Genesis/Mega Drive—the flow is zone by zone. Keep the pace, scoop up rings, but the real trick is knowing when to branch off and what waits behind that next door or vine. No fluff: tight routes, hidden alcoves, safe boss paths, plus a few reliable Giant Ring spots for Chaos Emeralds and Blue Spheres.
Angel Island Zone
In Act 1, grab the vines right after the starting clearing and climb into the canopy. Where a cracked wall hides under bushes, bust it with a spin—your first Giant Ring is behind it. When the fire kicks off, don’t panic: the top catwalks let you clear the flames easier, and a water shield snuffs fire instantly. The miniboss loves to hover over the water—hit between his volleys and don’t eat the flames.
In Act 2, watch for chipped walls—many break into tight “rooms” with monitors and shortcuts. Before the bridge with ballistae, duck under the big tree root: there’s a short tunnel to another Giant Ring. Robotnik (Eggman) fights you in a cramped spot—approach from the lower platform and tag the body after each shot instead of trying to juggle him mid-air.
Hydrocity Zone
Currents and turbines pull you down. Never stand under fast crushers—they’re brutal. On long water slides, stay near the center of the pipe so you aren’t slung into spikes. In Act 1, before the spiral column section, ditch the lightning shield—water cancels it—while the water shield is clutch: bounce off the surface to punch out of whirlpools. The drill-happy underwater miniboss? Hang just behind, poke during his brief pause, then drop away so the turnaround doesn’t clip you.
In Act 2, look for cracked arches low to the ground—Giant Rings love to hide there. Near the long horizontal turbine is a side pocket: break the wall and you’ll pop straight into Blue Spheres. The whirlpool boss drags you center; without a water shield, hug the walls, use quick double hops, and strike from above as the pull eases. One greedy swing and you’re gone—keep it tidy.
Marble Garden Zone
These stony gardens are trap-happy. If you land on a spin-top, don’t bail—charge it to max and launch to the upper route: safer, richer in rings. In Act 1, there’s a platform with two totems and a crumble column—break the right wall behind the totem for a short corridor to a Giant Ring. In tight shafts, don’t full-send—crushers drop in steps; wait for the lift, then roll through.
Near the end of Act 2, the ground starts collapsing. Don’t drag the fight downward—hop ledges and reset on level ground. In the aerial phase versus Robotnik, take your time: smack the capsule from below when he stalls without spinning. Running Sonic with Tails? Let him lift you half a body higher—it’s easier to tag the weak spots.
Carnival Night Zone
The big puzzle is that infamous red barrel. Don’t bounce forever—use up/down to rock it in rhythm until it sinks enough to slip under. It helps to arrive with a lightning shield—it vacuums rings, and this carnival showers you with them. In Act 1, after the room with colored balls and springy columns, backtrack half a screen and test the lamp-lined left wall—it’s “soft,” with a Giant Ring stash behind it.
In Act 2, mind the light switches—when it’s dark, the magnet platform will gobble your rings. Wait out its discharge behind cover, then hit the chassis twice and bail. On the generator boss, engage only when it sputters; during the bright cycle it heats up and reflects damage. Three or four clean passes and you’re through.
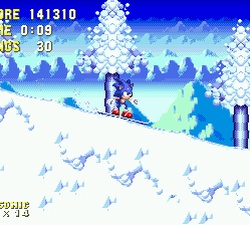
IceCap Zone
After that slick snowboard intro, expect icy “rooms” with thin walls. Where the frost-caked ceiling shows hairline cracks, spin through—those spots often hide shields or a Giant Ring. Knock ice columns down with a running start, not from above—the shards won’t nick you. In tight shafts with swinging spikes, move in beats: step—hold—step. The ice-chunk miniboss? Never stand underneath—poke from the side, bounce to a platform, and wait for the ice to crumble.
In Act 2, a fire shield is gold—it prevents freezing and opens a couple of snowed-in nooks. Before the big stack of vertical tubes, check the lower-right wall—there’s a pocket with a Giant Ring. The final machine fires cold on a count—one-two-three; jump onto the body on “two” and bail before “three,” when the blast lands.
Launch Base Zone
This is the launch site where Knuckles reroutes you more than once. If he hits the detonator and the bridge collapses, take the lower channel: you’ll hit a section with spiral lifts—stand dead center, don’t lean left/right, or you’ll get flung into spikes. In Act 1 after a bank of turrets, check the yellow-streaked left wall—break into a short corridor with a star post; with 50 rings, jump into the shimmer above it to enter a Bonus Stage. A bit farther on, the right fork leads to a Giant Ring; your landmark is a crane with a lone bulb.
On the midboss, hang at mid-height: hits on the cannon from above are safer than trading fire below. The final grabber mech—the Big Arm in the Sonic 3 version—snatches and slams; clip it during the dive when the arms rise. If it grabs you, don’t panic—press jump on the landing frame to break free without losing tempo. Super Sonic makes this trivial, so if you’ve banked all Chaos Emeralds via Giant Rings and Blue Spheres, flip the switch.
A couple of must-do little things on the way
Star posts aren’t just checkpoints. With 50 rings, jump above one to enter a Bonus Stage: the Gumball Machine is great for shields, while the sphere-style bonus showers rings and extra lives. Giant Rings usually lurk behind cracked walls on upper routes or in side pockets at forks. Chasing Super Sonic and a clean Sonic 3 clear? Probe suspicious walls and backtrack half a screen after big drops.
And yes, that red barrel moment in the carnival isn’t a bug or a dead end. Up-down, calm, on beat. Then it’s full send. For more on vibe, shields, and techniques, read /gameplay/, and for a bit of backstory, hit /history/. But for a straight clear this is enough: know the nooks, know when to ease off and when to press, and Sonic 3 just flies under your thumbs.